
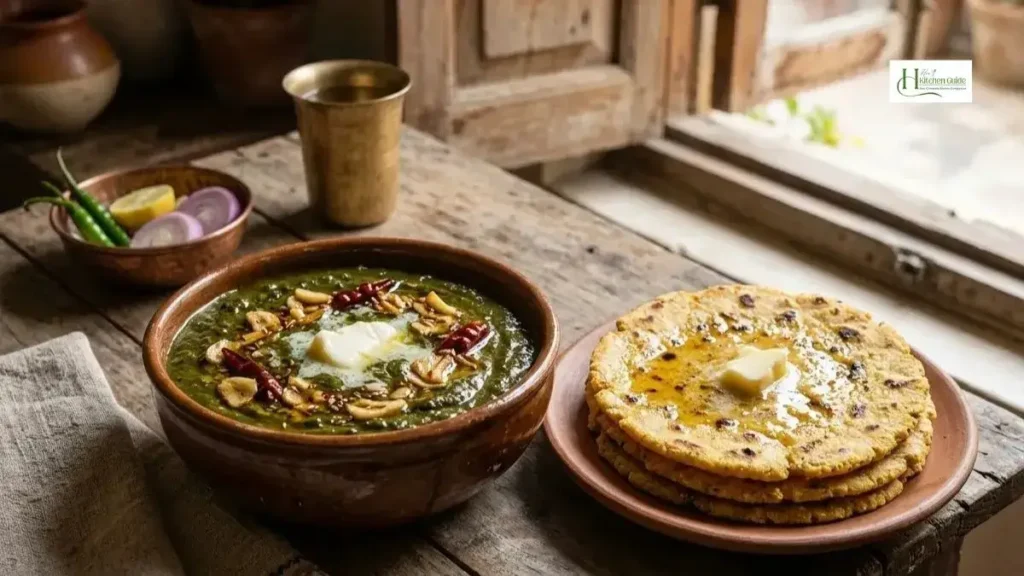
What is Sarson Ka Saag?
Sarson Ka Saag is a traditional Punjabi and Pakistani winter dish made mainly with mustard greens, usually combined with spinach and sometimes bathua. The greens are cooked until soft, mashed into a thick creamy texture, and finished with a garlic tadka, butter, or desi ghee.
Sarson ka saag is one of those winter dishes that takes time, patience, and a little bit of work, but the final bowl makes you feel that every bit of effort was worth it.
In Punjab, saag is more than something you simply cook and serve. For many families, it is part of the winter season itself. Fresh mustard greens are cleaned, cooked slowly, mashed until creamy, and finished with a simple garlic tadka, butter, or desi ghee.
And there is another part of making saag that I especially love: it is made for sharing.
When a large batch is prepared, a few portions can easily find their way to family members, relatives, neighbours, or friends. A simple container of homemade saag can feel like a thoughtful winter gift, especially when it has been cooked with fresh greens and plenty of patience.
I learned to make saag after my marriage from relatives in my in-laws’ village, where fresh greens were available from the fields during winter. That experience also taught me that the small details matter, from cleaning the leaves properly to keeping the tender stems instead of throwing them away.
In this recipe, I am sharing the traditional village-style method I learned, along with a quicker pressure-cooker option for those days when spending several hours at the stove simply isn’t practical.
Let’s start with the greens, because that is where a good saag begins.
What Makes Sarson Ka Saag Special?
A good saag does not depend on a long list of spices. Its character comes mainly from the greens and the way they are prepared.
Here are the things that make a difference:
- Fresh mustard greens: Sarson gives the saag its main earthy, traditional flavor.
- Palak: It helps create a softer, smoother texture and balances the stronger taste of mustard greens.
- Bathua: A smaller amount can add an earthy, traditional flavor, but it is optional.
- Proper cleaning: Sand and soil can easily hide between the leaves and stems, so thorough washing is essential.
- Slow cooking: The traditional method allows the greens to soften gradually and develop a deeper flavor.
- Good mashing: Properly mashed greens give saag the creamy, rustic texture we expect from a traditional bowl.
- A simple finishing touch: Garlic cooked in oil, followed by butter or desi ghee, brings everything together.
If you are making saag for the first time, don’t worry about making it perfect on your first attempt. Once you understand how the greens behave during cleaning, cooking, and mashing, the process becomes much easier.
And if you are making a large batch, don’t think of the extra quantity as a problem. Saag freezes well in portions, and sharing a few containers with someone you care about is one of the nicest parts of making it.
The Greens You Need for Sarson Ka Saag
A good Sarson Ka Saag does not need a complicated list of ingredients. The main thing is getting the right combination of leafy greens.
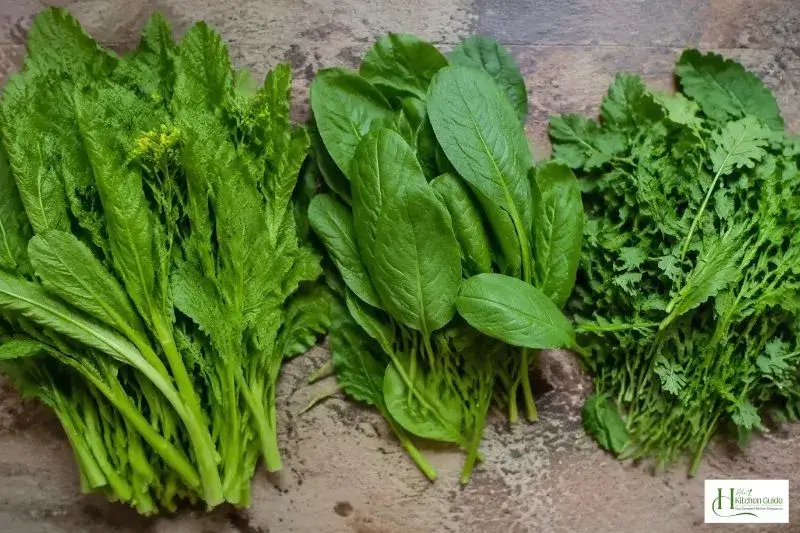
1. Sarson (Mustard Greens)
Sarson is the main green in this recipe and gives the saag its distinctive earthy flavour.
When preparing it, don’t throw away the tender stems. After cleaning and peeling the tougher outer part, the stems can be cooked along with the leaves. They add moisture and flavour to the saag.
2. Palak (Spinach)
Palak helps balance the stronger flavour of mustard greens and gives the finished saag a softer, smoother texture.
For this recipe, palak is not just an extra green. It works together with sarson to create the creamy consistency we want after cooking and mashing.
3. Bathua (Goosefoot)
Bathua is optional, but I like adding a smaller amount when it is available.
You can use about ½ kg to ¾ kg bathua, depending on how much saag you are making and how strong you want its flavour to be.
If bathua is not available, you can still make delicious saag with sarson and palak.
How Much Sarson, Palak and Bathua Do You Need?
For a large traditional batch, the quantities can vary depending on how much saag you want to prepare and how much the greens reduce after cleaning and cooking.
A practical combination for this recipe is:
| Green | Approximate Quantity |
|---|---|
| Sarson (mustard greens) | 3 kg |
| Palak (spinach) | 1.5 kg |
| Bathua | ½ to ¾ kg |
💚 Her Kitchen Guide Tip:
The weight of leafy greens changes considerably after removing tough stems and damaged leaves, so don’t worry if your cleaned quantity looks much smaller than what you started with.
Why This Combination Works
- Sarson gives the saag its main flavour.
- Palak softens and balances the stronger mustard flavour.
- Bathua adds an earthy traditional note.
- The combination becomes beautifully creamy once the greens are cooked and mashed properly.
If you don’t have bathua, don’t skip making the saag altogether. Sarson and palak can still give you a very satisfying result.
A Small Tip Before You Start
If you have access to fresh, locally grown greens, use them. This is especially nice when making a traditional winter batch. If you’re setting up your first kitchen, our kitchen essentials for new brides guide can help you choose the right tools.
But you don’t need to live in a village or have access to your own fields to make good saag. Fresh market greens can work very well too. The important thing is to clean them thoroughly and cook them properly.
How to Clean Sarson, Palak & Bathua Properly
Before we cook the saag, there is one step that deserves more attention than it usually gets: cleaning the greens properly.
Fresh saag can carry soil, sand, and grit, especially when it comes straight from the fields or a local market. And once the leaves are chopped, cleaning them becomes much more difficult.
How Should You Clean Saag Before Cooking?
The easiest method is to wash the whole leaves thoroughly before cutting them. This makes the greens easier to handle and helps remove hidden soil and grit before you start chopping.
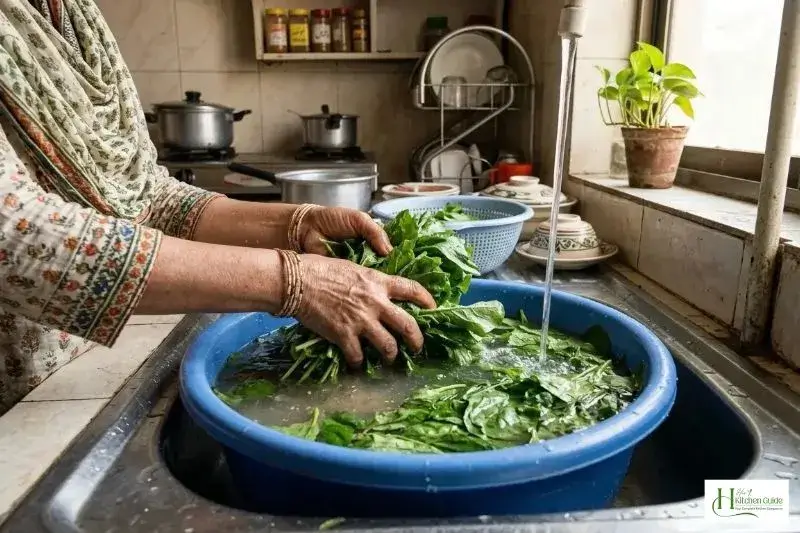
Why I Prefer Washing Before Cutting
When I make saag, I prefer to wash the whole leaves first because:
- Large leaves are easier to handle than tiny chopped pieces.
- You can see and remove soil more easily.
- There is less mess around the sink.
- Small pieces of chopped leaves don’t get stuck everywhere.
- You don’t need to deal with a large strainer full of tiny pieces.
- It can reduce unnecessary wastage.
Once the leaves are clean, cutting them becomes a much easier job.
Step-by-Step: Washing the Greens
1. Sort the Greens First
Go through the sarson, palak, and bathua and remove:
- Yellow or damaged leaves
- Very tough or unwanted stems
- Any visible dirt or debris
Don’t throw away the useful tender stems, especially from the sarson. We will prepare those separately before chopping.
2. Wash the Whole Leaves
Fill a large pot or clean basin with water and place the whole leaves in it.
Move the leaves around gently with your hands so that loose soil and sand can separate from them.
3. Drain and Repeat
Drain the dirty water and fill the pot with fresh water.
Repeat this process until the water is reasonably clear and you can no longer see sand or soil settling at the bottom.
Don’t rush this step. A few extra minutes of washing are much better than finding grit in your finished saag.
4. Let the Greens Drain
Once the leaves are properly washed, drain the excess water.
You don’t need to dry them completely. Just allow the extra water to drain before moving on to cutting.
Preparing Each Green
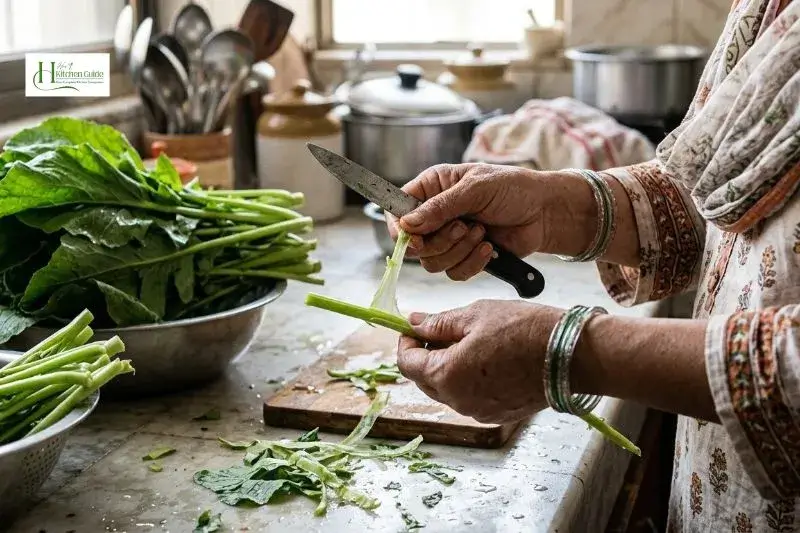
Sarson (Mustard Greens)
Sarson needs a little more preparation than the other greens.
- Take the leaves one by one.
- Clean and peel the tougher outer part of the stems, almost like removing a thin skin.
- Keep the tender stems instead of throwing them away.
- Chop the leaves and prepared stems into manageable pieces.
The stems are not waste. They become soft during the long cooking process and contribute to the flavour and texture of the saag.
Palak (Spinach)
For palak:
- Separate the leaves from thick, tough stems.
- Keep the tender parts.
- Remove any damaged leaves.
- Chop the cleaned leaves into manageable pieces.
Bathua
Bathua is used in a smaller quantity in this recipe.
- Remove unwanted or damaged parts.
- Keep the usable leafy portions.
- Wash thoroughly.
- Chop before adding it to the other greens.
One More Practical Tip
If you’re preparing several kilograms of greens, don’t try to cut everything first and then figure out how to wash it.
It may seem quicker initially, but a large pile of tiny chopped leaves can become difficult to manage. Washing first keeps the process much more organised.
And once everything is clean and chopped, you’re ready for the part that makes traditional saag so special: slow cooking.
Traditional Village-Style Sarson Ka Saag
Once all the greens are cleaned and chopped, the real cooking begins. This is the part that takes patience, but it is also where the saag develops that deep, slow-cooked flavour.
How Do You Cook Sarson Ka Saag Traditionally?
For traditional village-style Sarson Ka Saag, the cleaned greens are cooked slowly in a wide pot for about 4 to 5 hours until the leaves and stems become completely soft and ready to be mashed.
Traditional Cooking Method
1. Use a Wide Pot
Take a large, wide-mouth daigchi or cooking pot.
A wide pot is particularly useful when you’re making a large batch because the greens initially take up a lot of space. Once they start cooking, they wilt and gradually settle down.
2. Add Clean Water
Add enough clean, filtered water to the pot so that the greens can cook properly.
You don’t want to drown the saag in excessive water, but there should be enough moisture for the greens to soften during the long cooking process.
3. Add the Greens
Add your prepared:
- Sarson
- Palak
- Bathua
to the pot.
At first, the quantity may look surprisingly large. Don’t worry. As the greens cook, they will wilt and reduce considerably.
4. Start on Medium Heat
Place the pot over medium heat and let the greens begin cooking.
As they soften and settle down, reduce the heat.
5. Lower the Flame and Partially Cover
Once the greens have wilted, turn the flame down to low and partially cover the pot with a lid.
Now comes the part where traditional saag needs patience.
There is no need to keep stirring constantly. Let the greens cook gently and gradually soften.
6. Add Green Chilies and Salt
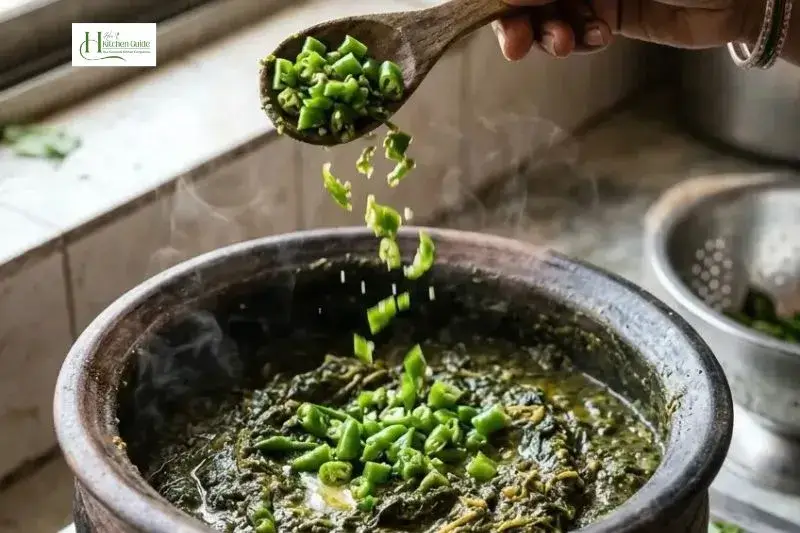
After about 30 minutes of cooking, add:
- Desi green chilies, cut into pieces
- Salt, according to taste
For a large batch of around 3 kg saag, you can use roughly 20 to 25 green chilies, depending on their heat and your preference.
Don’t feel that you have to follow that number exactly. Green chilies can vary quite a lot in their heat, so adjust them according to the type you have and how spicy you like your saag.
Why Green Chilies Instead of Lots of Red Chili Powder?
For this traditional version, green chilies are the main source of heat and flavour.
If you like, you can add around ½ to 1 tablespoon of red chili powder, but it is optional. I prefer the flavour of desi or farm-grown green chilies in saag because they give it a more traditional taste.
7. Let It Cook Slowly
Continue cooking the saag over low heat for around 4 to 5 hours. Cooking time can vary according to the freshness of the greens, the size of your pot, and the heat of your stove. Keep the heat low, check the moisture from time to time, and cook only until the leaves and tender stems are completely soft enough to mash easily.
This long, gentle cooking gives the greens plenty of time to soften, including the tender stems.
Keep an eye on the moisture while it cooks.
If the saag starts becoming too dry before the greens are completely soft, add a little more water.
Important Tip: Add Warm Water
If you need to add more water during cooking, use warm or lukewarm water rather than cold water.
This is a small practical habit that is easy to follow when you’re cooking a large pot of saag.
How Do You Know the Saag Is Ready for Mashing?
After several hours of slow cooking, the greens should be very soft and tender.
The leaves and stems should no longer feel firm when pressed with a spoon.
At this stage, turn off the stove and allow the saag to cool slightly.
Don’t rush straight into blending or mashing while it is extremely hot.
The next step is where the cooked greens are transformed into the thick, creamy texture we expect from good homemade saag.
A Note About the Traditional Method
Yes, 4 to 5 hours sounds like a long time.
But this is exactly why I want to keep the traditional method in this recipe. It reflects the way saag is traditionally cooked in village homes, where the focus is not on rushing the dish but on letting the greens soften slowly.
For busy days, we’ll also cover the pressure-cooker method later, so you can choose the method that suits your schedule.
How to Mash Sarson Ka Saag
After several hours of slow cooking, the greens should be completely soft. Now comes an important step: mashing the saag.
This is what turns the cooked leaves and stems into the thick, creamy texture we associate with traditional homemade saag.
Should You Blend or Mash Sarson Ka Saag?
You can use either method. A traditional wooden ghotna or madhani gives the saag a more rustic, homemade texture, while a blender is a convenient option when you want to save time.
Method 1: Traditional Ghotna or Madhani
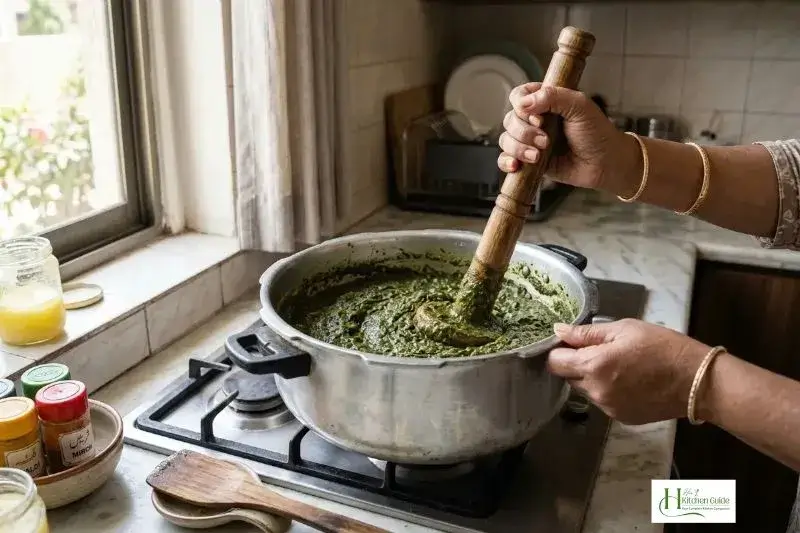
If you want to follow the traditional village-style method, use a wooden ghotna/madhani. For more essential kitchen tools, see our guide to must-have kitchen utensils.
How to Mash Saag Traditionally
- Turn off the stove after the greens have become completely soft.
- Let the saag cool slightly so it is warm rather than extremely hot.
- Use the ghotna or madhani in a circular motion.
- Keep mashing until the leaves and stems break down well.
- Continue until you get a thick, creamy-looking saag.
Don’t worry if some texture remains. Traditional saag does not need to be perfectly smooth like a blended soup.
That slight rustic texture is part of its charm.
Method 2: Light Blending
If you don’t have a ghotna or simply want an easier method, you can use a blender.
For Better Texture:
- Allow the saag to cool a little before blending.
- Blend in batches if you have a large quantity.
- Don’t over-blend it into a completely smooth paste.
- Keep a little texture so the finished saag still feels like homemade saag.
My Preference
For a traditional batch, I like the ghotna/madhani method because it keeps the process closer to the way I learned to make saag.
But there is nothing wrong with using a blender when you are short on time. The important thing is to get the cooked greens properly mashed before moving to the next step.
How to Thicken Sarson Ka Saag Without Lumps
Once the greens are mashed, the next step is to bring the saag to the right consistency.
Traditionally, some people add wheat flour (atta) directly to the cooked saag. The problem is that adding dry flour straight into hot saag can sometimes leave small lumps.
My Simple Wheat Flour Trick
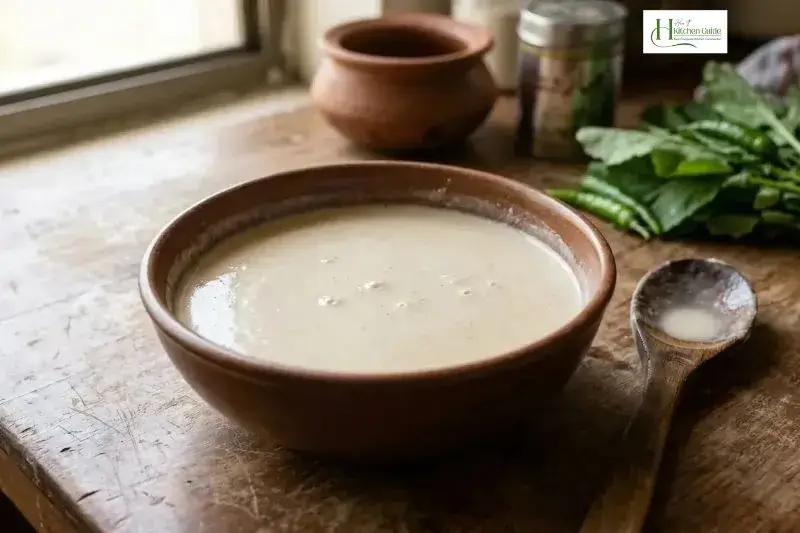
Instead of adding dry flour directly, I prefer making a smooth mixture first.
You will need:
- Wheat flour (atta), as needed
- Water, as needed
How to Do It
- Put the required amount of wheat flour in a separate bowl.
- Add water gradually.
- Mix until you have a smooth, creamy slurry.
- Let the mixture rest for about 10 minutes.
- Add it gradually to the mashed saag.
- Keep stirring as you add it.
- Continue cooking until the saag reaches the creamy consistency you like.
Why I Prefer This Method
- It helps prevent flour lumps.
- You have better control over the thickness.
- The flour mixes more evenly into the saag.
- You can adjust the amount according to the consistency you want.
I use ordinary wheat flour rather than besan for this saag. For the traditional version I’m sharing here, that is the method I prefer.
What Should the Final Saag Look Like?
The finished saag should be:
- Thick but not dry
- Creamy and well mashed
- Soft enough to scoop easily with roti
- Moist enough to reheat without becoming too dry
Don’t worry if your saag looks slightly loose immediately after adding the flour mixture. It will continue to thicken as it cooks.
Once you are happy with the consistency, we move on to one of the most flavourful parts of the recipe: the garlic tadka and final butter or desi ghee finish.
Garlic Tadka and the Final Touch
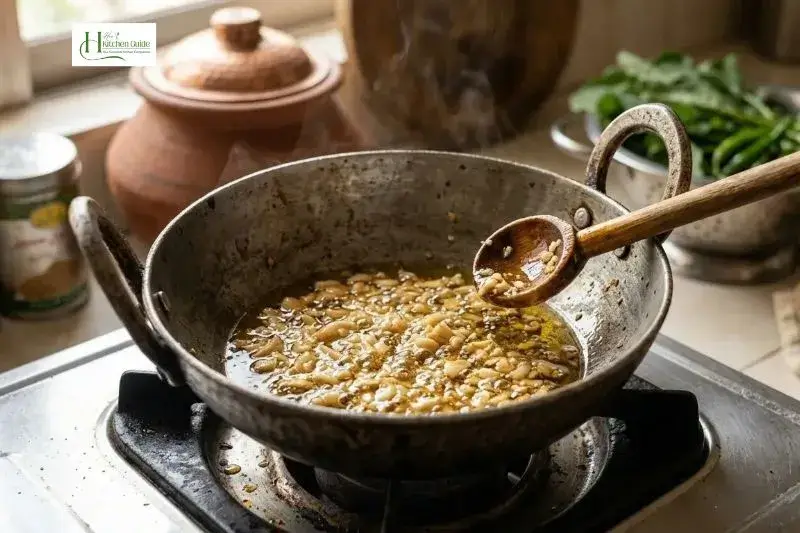
Once your saag is properly cooked, mashed, and thickened, there is one last step that brings all those flavours together: the tadka.
For me, this is where a simple bowl of saag starts smelling and tasting like the saag I remember from traditional village cooking.
How Do You Make Garlic Tadka for Sarson Ka Saag?
Heat oil, add crushed garlic, and cook it until lightly golden. Then add the tadka to the prepared saag and finish it with a little white butter or desi ghee.
How to Make the Garlic Tadka
What You Need
- Cooking oil, as needed
- Fresh garlic cloves, crushed
- White butter (makhan) or desi ghee, for finishing
Step-by-Step
- Heat a small amount of oil in a pan.
- Add the crushed garlic.
- Cook over medium heat until the garlic turns light golden brown.
- Be careful not to burn it. Burnt garlic can make the whole tadka taste bitter.
- Add the required amount of prepared saag to the tadka, or pour the garlic tadka over the saag.
- Give it a good stir and let the flavours come together.
- Finish with a small piece of white butter or a little desi ghee on top.
You don’t need a complicated tempering for this recipe. The combination of garlic, oil, and butter or ghee is enough to bring out the flavour of the cooked greens.
Can You Use Ginger Instead of Garlic?
Yes. Some people prefer:
- Garlic tadka for a stronger, more traditional flavour
- Ginger tadka for a milder, aromatic taste
- Garlic + ginger for a combination of both
For this recipe, I prefer garlic, especially when serving traditional saag with roti.
What to Serve with Sarson Ka Saag
A warm bowl of saag is traditionally served with makki ki roti, but you don’t have to limit yourself to one type of bread.
Traditional Pairing
Makki ki roti is the classic choice. Its slightly rustic texture goes beautifully with creamy saag.
An Easier Everyday Option
If you find makki ki roti difficult to make, ghar ki wheat roti works perfectly well too.
It is softer, easier to handle, and especially convenient when you’re making saag for the whole family.
Don’t Forget the Finishing Touches
Serve the saag hot with:
- Makki ki roti
- Ghar ki wheat roti
- White butter
- Desi ghee
A little butter melting over hot saag is one of those simple touches that makes the dish feel complete.
A Note About the Tadka
If you are preparing saag to freeze or share, there is one useful thing to remember:
Freeze the cooked saag before adding the final tadka.
The fresh garlic tadka, butter, or desi ghee can be added when the saag is reheated and ready to serve.
We’ll cover the freezing and sharing method in the next section.
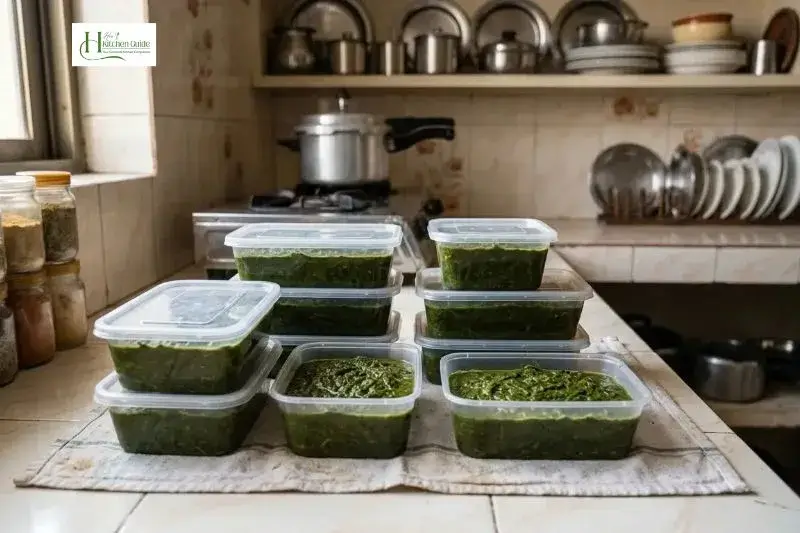
Sarson ka saag takes time to prepare, especially when you make it the traditional way. That is why I usually prefer making a good-sized batch rather than cooking a small amount every time.
The nice thing is that you can portion the cooked saag, freeze it, and enjoy it later. And if you have made a large batch, there is often enough to share with family, relatives, neighbours, or friends too.
Can You Freeze Sarson Ka Saag?
Yes, Sarson Ka Saag can be frozen. For the best result, freeze the cooked saag before adding the final garlic tadka, butter, or desi ghee. Add those fresh when you reheat it for serving.
How I Freeze Saag
Once the saag has been fully cooked, mashed, and thickened:
- Let it cool completely.
- Divide it into portions according to your needs.
- Transfer the portions into clean, freezer-safe containers. For general food safety recommendations on freezing homemade meals, you can also check these safe freezer storage guidelines.
- Close the containers properly.
- Label them with the date if you are preparing several portions.
- Place them in the freezer.
Freezing individual portions makes things much easier later. You can take out only the amount you need instead of thawing the whole batch.
How to Reheat Frozen Saag
When you are ready to serve it:
- Thaw the required portion.
- Transfer it to a pan.
- Reheat gently on the stove.
- If it has thickened too much, add a small amount of water and stir.
- Prepare fresh garlic tadka.
- Finish with white butter or desi ghee.
- Serve hot with roti.
That fresh tadka at the end makes a big difference. Even after freezing, the saag gets that freshly cooked aroma again.
Saag Is Made for Sharing
One of my favourite things about making a large batch of saag is being able to share it.
When you have spent hours cleaning the greens, cooking them slowly and preparing the final tadka, putting a few portions aside for someone else feels like a small act of love.
You can pack the cooled saag into clean containers and share it with:
- Family members
- Relatives
- Neighbours
- Friends
- Someone who may not have the time to make it themselves
It doesn’t have to be a special occasion. A container of homemade saag on a cold winter day can be a very thoughtful gift.
Sometimes the simplest homemade food carries the most warmth. If you’re planning a winter family gathering, you might also enjoy making Chicken Shami Kababs to serve alongside saag.
And if you are making saag for a family gathering or winter get-together, making a larger batch also means you can keep a few portions in the freezer for another day.
A Simple Winter Tradition
For me, this is what makes homemade saag special. It is not only about getting a creamy texture or the perfect garlic tadka. It is about the time spent making it and then having enough to share with the people around you.
A big pot of saag can feed a family, fill a freezer, and still leave a few containers to send to someone you care about.
Quick Pressure Cooker Method for Sarson Ka Saag
Traditional saag is worth the time, but there are days when spending four or five hours cooking is simply not practical. For those days, a pressure cooker can make the process much easier.
You still get the same combination of sarson, palak, and bathua, but the cooking time is much shorter.
How Do You Make Sarson Ka Saag in a Pressure Cooker?
Clean and chop the greens, cook them with green chilies and salt in a pressure cooker for about 30 minutes, then mash or blend and finish with the wheat flour mixture and garlic tadka.
Quick Method
- Clean the greens thoroughly using the method explained earlier.
- Prepare the sarson stems and chop all the greens.
- Add the sarson, palak, and bathua to the pressure cooker.
- Add enough water to help the greens cook properly.
- Add the green chilies and salt.
- Close the cooker and cook for about 30 minutes.
- Let the pressure release naturally and allow the saag to cool slightly.
- Mash it with a traditional ghotna or blend it lightly.
- Prepare the wheat flour and water mixture separately.
- Gradually add it to the saag while stirring.
- Cook until the saag reaches the creamy consistency you like.
- Finish with fresh garlic tadka.
- Add white butter or desi ghee before serving.
Note:
In a stovetop pressure cooker, the exact time can vary by cooker and heat level; in an electric pressure cooker, use a suitable pressure-cooking setting and allow the pressure to release naturally before opening. Once the greens are soft, continue with the mashing, thickening and tadka steps
In my stovetop pressure cooker, I cook the greens for about 30 minutes on low-to-medium heat after pressure builds.
Traditional or Pressure Cooker: Which Should You Use?
It really depends on your day.
Choose the traditional method if:
- You have enough time.
- You want the slow-cooked village-style experience.
- You are making saag as a special winter meal.
- You are preparing a large batch for sharing or freezing.
Choose the pressure cooker if:
- You are short on time.
- You want homemade saag without spending hours at the stove.
- You are making a smaller batch.
- You want an easier option for a busy weekday.
The pressure cooker method may save several hours, but the basic process remains the same: clean the greens properly, cook them until completely soft, mash them well, thicken with the wheat flour mixture, and finish with a good garlic tadka. For more ways to save time in the kitchen, see our time-saving cooking hacks.
For me, the traditional method still has its own charm, especially when fresh village-style greens are available. But the quicker method makes it much easier to enjoy saag even when life is busy.
Tips for Making the Best Sarson Ka Saag
Making saag becomes much easier once you know a few small things that can make a big difference to the final taste and texture.
1. Use Fresh Greens When Possible
Fresh, locally grown sarson, palak, and bathua can give the saag a wonderful flavour. If you don’t have access to freshly harvested greens, good-quality market greens can still make delicious saag.
2. Don’t Throw Away the Tender Sarson Stems
The stems are worth keeping. Clean and peel the tougher outer part, then cook the tender stems along with the leaves.
They soften during the long cooking process and become part of the creamy saag.
3. Wash Before Cutting
For a large batch, washing the whole leaves before chopping is much easier to manage.
It also makes it easier to remove sand and soil properly.
4. Don’t Rush the Traditional Method
If you have chosen the traditional daigchi method, give the greens enough time to soften properly.
The 4 to 5 hours of slow cooking are part of what gives this version its traditional character.
5. Use Warm Water if More Is Needed
If the saag needs additional water during the long cooking process, add warm or lukewarm water rather than cold water.
6. Don’t Overdo the Red Chili
Green chilies are the main source of heat in this recipe. Red chili powder is optional, so there is no need to add a large amount.
Adjust the green chilies according to their heat and your own preference.
7. Mash the Greens Properly
Whether you use a traditional ghotna or a blender, don’t skip the mashing step.
The cooked greens need to break down properly to give you that thick, creamy saag texture.
8. Make a Wheat Flour Slurry
Adding dry flour directly to hot saag can result in lumps.
Mix the wheat flour with water separately, let it sit for a few minutes, and then gradually add it while stirring.
9. Don’t Skip the Garlic Tadka
The cooked greens have a wonderful flavour on their own, but fresh garlic tadka gives the finished saag a completely different aroma.
Finish with a little white butter or desi ghee if you enjoy a richer taste.
10. Make Extra and Share It
If you’re already spending several hours making saag, consider making a larger batch.
Keep some for the freezer and send a portion to a family member, neighbour, relative, or friend.
A little extra saag can turn an ordinary winter meal into something worth sharing
Is Sarson Ka Saag Healthy?
Sarson Ka Saag is a traditional winter dish made mainly with leafy greens such as mustard greens, spinach, and bathua. These greens naturally provide fiber and a range of vitamins and minerals.
Because the final dish also includes oil, garlic, butter or desi ghee, the overall nutrition depends on the ingredients and portion size.
Some Nutritional Benefits of the Greens
- Leafy greens provide fiber, which can support healthy digestion. According to the USDA FoodData Central, mustard greens and spinach are rich in vitamins A, C, K, iron, and calcium.
- Mustard greens and spinach contain vitamins and minerals that are part of a balanced diet. Research shows that mustard greens are particularly high in antioxidants and vitamin K, which support bone health and immunity.
- Green vegetables provide antioxidants and other beneficial plant compounds.
- The amount of oil, butter, and ghee can be adjusted according to your preference.
For a traditional winter meal, serve a moderate portion of saag with roti and enjoy it as part of a balanced diet.
Authentic Sarson Ka Saag Recipe Card
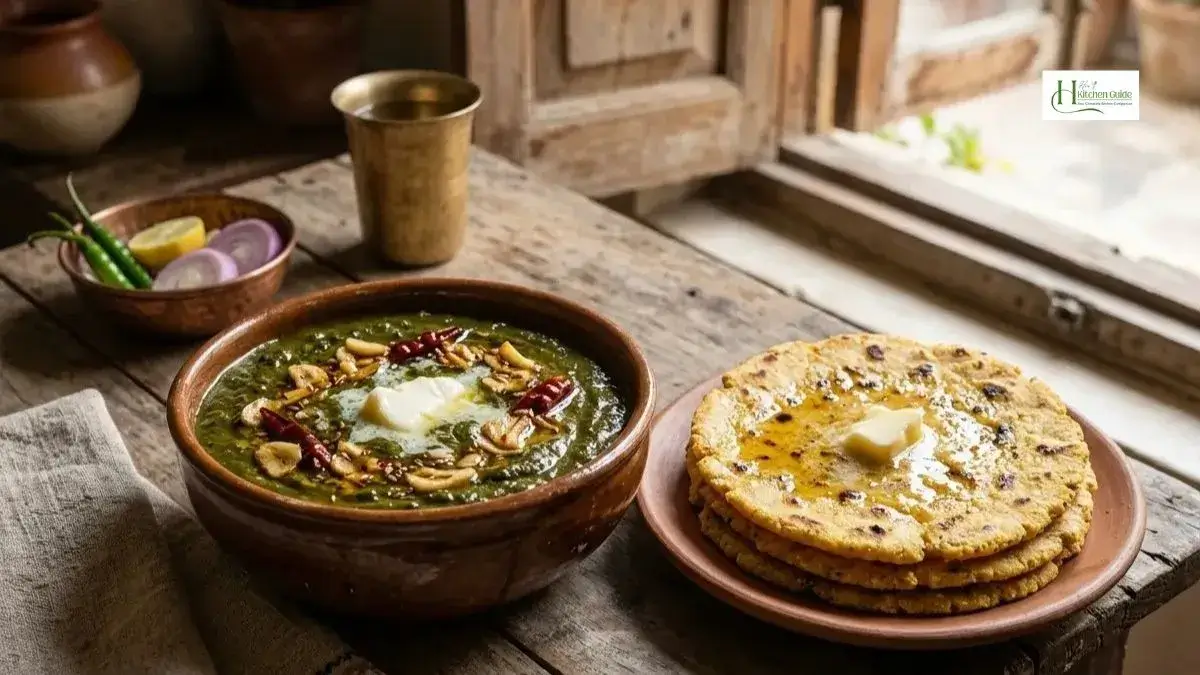

Sarson Ka Saag
Ingredients
Equipment
Method
- Clean the mustard stems and remove only the tough outer portion.
- Prepare the palak and bathua and chop the greens.
- Add the greens to a large, wide-mouth pot with enough clean water.
- Cook over medium heat until the greens wilt, then lower the heat and partially cover the pot.
- After about 30 minutes, add the green chilies and salt.
- Continue cooking slowly for about 4 to 5 hours, adding warm water when needed.
- Once the greens are completely soft, allow them to cool slightly.
- Mash with a traditional ghotna or use a blender lightly. Avoid over-blending.
- Mix wheat flour with water separately to make a smooth slurry.
- Let the mixture rest for about 10 minutes, then gradually add it to the saag while stirring.
- Cook until the saag reaches a thick, creamy consistency.
- For the tadka, heat oil and add crushed garlic. Cook until lightly golden.
- Add the required amount of saag and let the garlic flavour blend into it.
- Finish with white butter or desi ghee and serve hot with roti.
Video
Notes
Frequently Asked Questions
Can I make Sarson Ka Saag without bathua?
Yes. Bathua is optional. If it is not available, sarson and palak can still make delicious saag.
How do I stop Sarson Ka Saag from tasting bitter?
Fresh greens and the right balance of palak can help create a more balanced flavour. If your mustard greens are particularly strong or bitter, you can increase the palak slightly and adjust the red chili powder.
Can I freeze Sarson Ka Saag?
Yes. For the best result, freeze the saag before adding the final garlic tadka.
Cool it completely, divide it into freezer-safe containers, and freeze in portions. When you want to serve it, thaw and reheat it, then prepare fresh garlic tadka and finish with butter or desi ghee.
Can I make Sarson Ka Saag in a pressure cooker?
Yes. This is the quicker option for busy days. Cook the cleaned greens with water, green chilies, and salt in a pressure cooker for about 30 minutes. Once slightly cooled, mash or blend them and continue with the wheat flour slurry and tadka.
Can I use only sarson and palak?
Absolutely. If bathua is unavailable, sarson and palak are enough to make a flavorful saag.
What should I serve with Sarson Ka Saag?
Makki ki roti is the traditional pairing, but wheat roti is also a practical option, especially if you prefer a softer roti.
How much saag should I make?
If you are making traditional saag, preparing a larger batch can be worthwhile because the slow-cooking process takes several hours. You can freeze some for later or share it with family, relatives, or neighbours.
Can I make a smaller batch of Sarson Ka Saag?
Yes. This recipe is designed as a large traditional batch for family meals, freezing and sharing. For a smaller household, simply halve the quantities of sarson, palak, bathua, green chilies and flour mixture. The cooking time may be shorter, so check the greens and cook only until they are soft enough to mash easily.
Why is my Sarson Ka Saag watery?
Saag can look watery if the greens have not cooked down enough or if too much water was added during cooking. Continue cooking gently until excess moisture reduces, then add the wheat-flour slurry gradually while stirring. The saag will thicken further as it cooks and cools.
Can I use makai ka atta instead of wheat flour in Sarson Ka Saag?
Yes, some families use makai ka atta to thicken Sarson Ka Saag. In this recipe, I use wheat flour because I prefer its texture and because it mixes smoothly when prepared as a slurry first. Use the flour that suits your family’s taste, but add it gradually to avoid making the saag too thick.
Final Thoughts
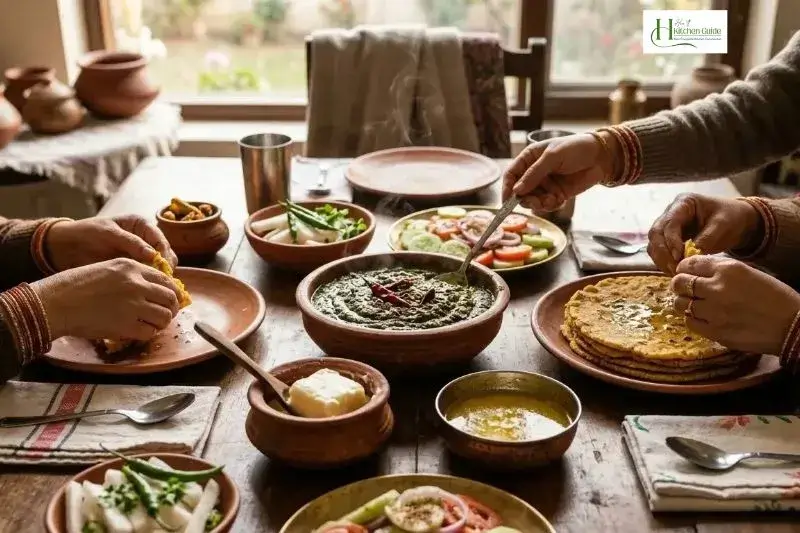
Sarson Ka Saag is more than just another winter recipe. It takes time, patience, and a little effort, but that is also what makes it special.
From carefully cleaning the greens to slowly cooking them for hours, mashing them into a creamy saag, and finishing with fragrant garlic tadka, every step adds something to the final dish.
Whether you make it the traditional village-style way or use the quicker pressure-cooker method, the important things are simple: fresh greens, proper cleaning, patient cooking, and a good garlic tadka. For more traditional Pakistani recipes, browse our Pakistani Recipes category.
And perhaps the best part is that saag is not a dish I like to keep only for my own table. A large batch can be divided, frozen, or shared with the people you love.
Sometimes a simple homemade meal carries the most warmth when it is shared.
